On my new mini album, that is!
After adding the 8 new sheets of paper from the Counterfeit Kit Challenge (I measured wrong and needed this size for my photos - so glad I placed a few on my first page to be sure before making a large number of pages), I started making some double sided library pockets. I hit my stash for this paper - I tend to buy a lot of a design when I like it, so I had enough left for 8 sheets. These will be my pages.
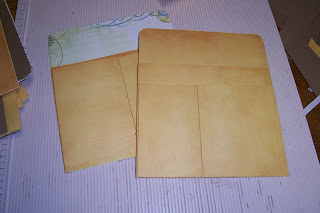
The next two photos show the back of a double sided library pocket with an insert (brown) for additional photos. I think I have almost 200 photos to include, so only my favorites will go on the outsides, the insides of these pockets are for the short stories from the side trips we made.
Sometimes I mess up and have a bit of an area left at the bottom of a pocket from the second flap, Once adhered, I just trim off the excess. After inserting the binding, no one will see anyway, but I still like to trim the edge.
So - two double sided library pockets with inserts.
A single, double sided library pocket with an envelope with large flap on the front and another double library pocket on the back.
Two double sided library pockets with front short flaps and back large flaps with band to use as an anchor for two particular photos. An advantage when putting a mini for yourself together - you have a basic idea of a few of the photos you want to include/highlight.
Another single, double sided library pocket with a miniature library pocket on the front. I may add more to this pocket, but wasn't positive yet, so kept it simple.
Finally, rounding out my 8 main pages, two double sided library pockets with tag pockets on the front. One of the two has equal size tag pockets, the other has a narrow pocket and a regular pocket.
So - where did I learn to do these? How did I create? Well, the library pocket is a conglomeration of many, many sites. It is one of my favorite pieces to use and I used to buy or create by printing out patterns, tracing to pp, then finally folding. It got to a point that I did create a step by step set of instructions you can find if you want to know how I create them. I am sure it is very similar to many other sites, but I was tired of always looking up every dimension and now there is no need! Plus, I love swapping scrapbook items, by getting the instructions ready, everyone over in the swap at Scrapbooking Fun.Biz can create them just as quickly if desired.
The library pockets are one of my favorite pieces to use, along with the narrow envelope I have on one of the pages. The narrow envelope is basically from an envelope I used in a project, liked and couldn't find in the right color, so used it as a pattern and make them when I need them.
For the bindings - I watched ustream and you-tube classes and bought various tutorials from Kathy Orta and Laura Dennison. I have practiced many of their albums (love Kathy Orta's build a page system) and have given away many as gifts. (though the fairy box by Laura Dennison is still only partially completed - I keep running out of the clear acryllic I am using for pages - maybe I will finish this year :)
I started with various techniques they taught, and now create my own designs. The Giraffe Double Mini Album (you can find it in December Archives on this blog) is the most complex I have done without a pattern. I started with some pocket protectors the individual wanted me to use and a Giraffe hanging she had found and went from that point. I only have a few photos shown - it takes 45 to display all the pages/flaps/etc..
After all the work of the Giraffe album, I realized I cannot remember where I learned how to make various items (there are more blogs and you tube videos, but I cannot remember them all) and so I don't give out patterns for my books as I cannot remember who to credit with the original technique. I know I have altered from what has been taught, but it would feel a bit like plagerism if I printed them on my blog. Sooo - I strongly encourage you to visit their sites, try out the tutorials/patterns and enjoy your journey. I know I have enjoyed many hours of learning and creating and hope you enjoy your time as well.


Ooh, these must have taken you ages! They look great! x
ReplyDeleteThanks - the pages really don't take that long to create once you know the size desired.
ReplyDelete