Thursday, January 17, 2013

Busy Times

This month has been flying by and it has been very busy.  Not much accomplished on my counterfeit kit, but hoping to get farther this weekend.  One Sr Album is complete, two more in process.

I took a break to try something different for some swaps over at Scrapbooking FUN.biz.

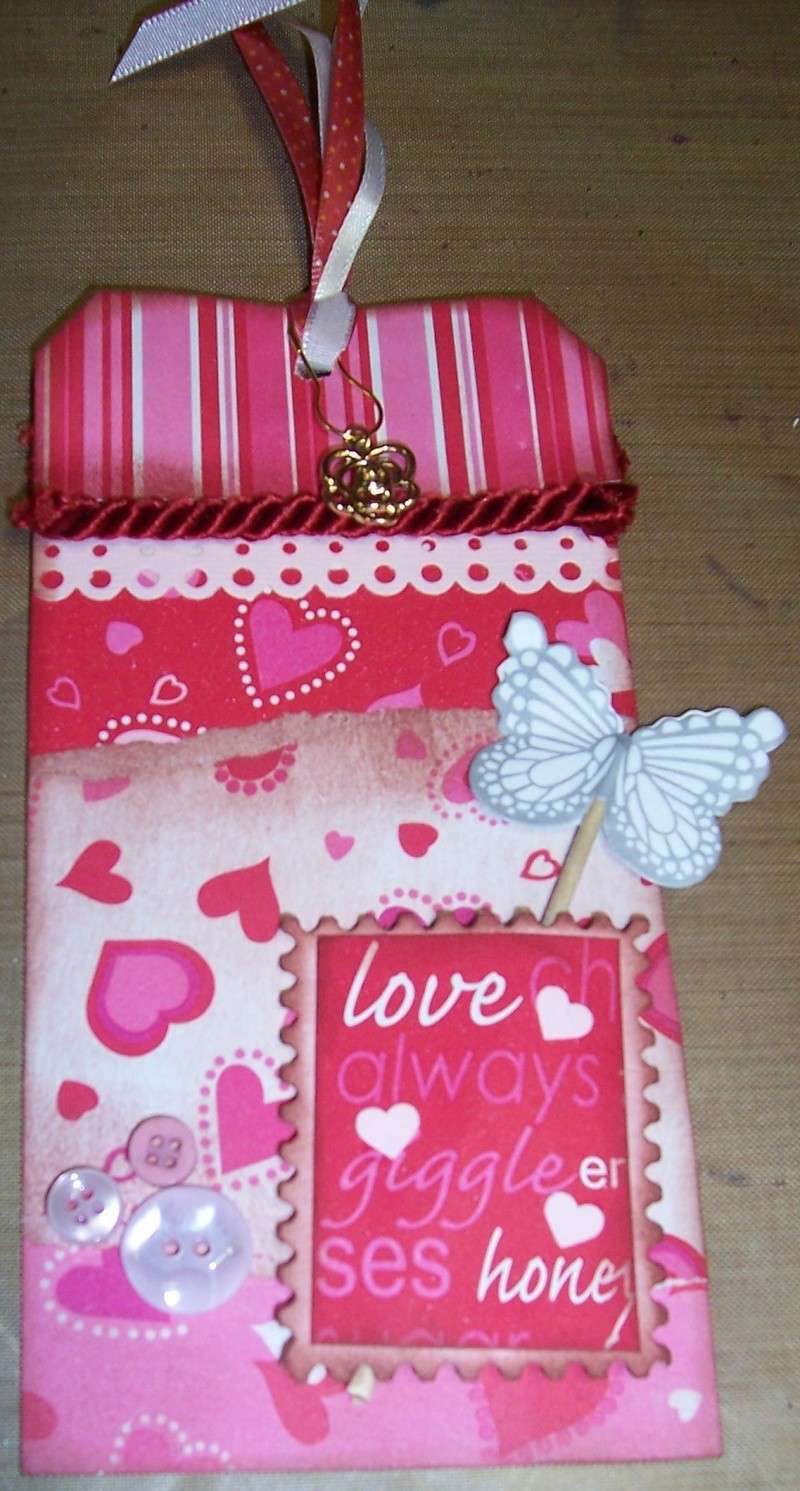
For a Vintage/Grunge Valentines Swap.  You can't see, but the tag (TH Christmas Tag Size) is a recycled piece - it is a neon color, but I couldn't toss them.  The ribbons are from either a dollar spot and just my stash.  The papers are from a pack of dollar spot (I think they were target) items.  The cardstock is either AC or Bazzill.  The Butterfly is a Martha Stewart cupcake topper, trimmed to fit.  Buttons (two are actually vintage), a little Jolee's charm and piece of trim complete the embellishments.  The stamp is one I made using some of my fancy scissors, a piece of dollar store paper, ink, and some little hearts left from some die cuts I had made.  I use my little separator drawers to keep some of these little punched images on hand - hearts, butterflies, leaves, etc..  Each has their own drawer.

For a Pick a Holiday Library Card Swap - pretty straightforward and plain, but I am happy with the results. Everything came from my stash.  AC Cardstock, some K & Company (or KI Memories, I can't remember) die cut pieces, the heart die cuts are from a laser cut sheet, the words on the front are from a DCWV paper pack.  The foam heart/scallop are from somewhere LOL.  The other two papers were from a dollar store - many years ago.  Other than the adhesvie, I think the newest pieces were the cardstock and the Be My Valentine Sentiment.  Keeping a drawer for Valetines papers and embellishments made creating this pretty fun.  Just go through the drawer and see what you feel like using.

Hoping to get a bit more completed this weekend.

Thursday, January 10, 2013

And the Senior Albums are coming along

First things first - double check my pattern - my notes on build-a-page albums, my sample and some work in progress.  The Build a page is design by Kathy Orta.  

Next - finish a sample page and it is time to assemble the various kits I will be using.  I use various tapes and Scotch adhesive to build these pages.

Kits assembled - paper for building, paper for decorating and various embellishments go into each baggie.  I bag things up per hockey skater.  Later, I will add photos and such, but parents are still tagging them for me. Their newspaper articles will be added at that time too - as well as some other items.

Here are the contents (almost all) of one kit - papers, embellishments and adhesive.  I put the main adhesive I will use into each bag.  From experience I know I will use two rolls of this one, some liquid glue and some scor-tape.  I won't use a whole role of scor-tape or a whole bottle of liquid glue, so those items just come from my stash.

I forgot to take a picture of the pages all assembled, but here are a few of the cover going together.


Finally - the book is bound.  A few embellishments for the cover so I can check out that I have enough paper and all (I do, but just of the non-background pp).

Finally - I have to be sure the covers are right.  After the wonderful gals over on cricut.com cut my pieces, I realized that one of the papers I thought I ordered, I didn't.  So, I had to adjust the size of the album a bit and the hockey sticks were a tad too large.  It nearly broke my heart, until my son had an idea - cut them apart.  Only those with this cartridge will ever know what I have done (plus I have another whole stick to use as an embellishment with a puck!  Yipee!!!!!)  Huge thanks as this is exactly what I am going for.  I forgot to put the O back on before the picture.  It will be done before the boys get their albums.
It is a bit tough to see, but the paper on the front is really sparkly/glittery.  It adds just enough to go with the emblems.  Our team is called Eagle Hockey, so the cover is perfect.  Now to finish the rest of the album - decorating pages, adding tabs/pull-outs, patterned paper, etc.

Those images turned out superb!  I am definitely going to need this cartridge in my library.  Next year?  There are currently 16 juniors skating - if that holds and we have 1-2 join for their senior year - I will be really busy!  May have to call in the reserves --- aka ladies who I hope to bring over to the scrapbooking side!  ROFL

Have a great one!3M Company CAT019 Scotch Scrapbooker's 2-Way Glue (Google Affiliate Ad)

Wednesday, January 9, 2013

Supplies have arrived

To make this year's Sr. hockey memory books.  A few of the boys have made the papers, so I have those articles to include in pockets in their particular albums.

Simple materials - this Urban Prairie, Bluebird from Basic Grey looks like ice that has had skate blades over the top, so will make a perfect base.  Also picked up several packages of tape from Scrapbuck.com to put everything together.  Scrapbuck has been great to help me stay on budget for these books.  I use this tape for the inner parts of the album, but still go back to Scor tape for the covers.  I like scor tape for chipboard or coated surfaces, but love this less expensive alternative for building the books.  It holds great for paper.  Also found these cute little tag books.  I bought multiples to be sure I have enough as well as some clearance hockey paper and some more miniature tags from Archivers to include.  Taking a break for a few days from my album to work on these.

Then some wonderful ladies over on the Cricut message board are helping me out by cutting the team images I need for this project from a cartridge I don't have.  I will try to remember to post pictures of the final albums.  They won't be large - after all these young men are off to college and there is a good chance these won't go with them.  However, they will be designed to fit/store nicely on a shelf.  Prior years players tend to take them once they move out of their houses.

Quick puppy update - they are growing fast!  Back when we got them.


Six months old now and growing to be even more fun and useful!  These giant puffballs are a blast outside, they learn quickly and are very intelligent.  They love the weather - the colder, the better.  It was -7 and windy the other morning and we figured they would be in the barn with the cats out of the wind.  Nope, these two were laying outside spread across a giant snowdrift just relaxing.  If it is snowing, they prefer to stay outdoors rather than in their wonderful barn.  These two hit panic mode when taking to the vet - basically they turn into heavy dead weight and don't move - flooring makes them nervous.  Luckily, only one more visit (at spaying time) and then our large animal vet takes over their care.  They guard their turf well even at this young age and it is exciting watching them learn new duties (they are Great Pyrenees Mountain Dogs in training to be our livestock guardians).  Their favorite pastime right now - playing king of the mountain and digging tunnels in a few different large piles of snow we have right now.


Sunday, January 6, 2013

Time to start

On my new mini album, that is!

After adding the 8 new sheets of paper from the Counterfeit Kit Challenge (I measured wrong and needed this size for my photos - so glad I placed a few on my first page to be sure before making a large number of pages), I started making some double sided library pockets.  I hit my stash for this paper - I tend to buy a lot of a design when I like it, so I had enough left for 8 sheets.  These will be my pages.

 The next two photos show the back of a double sided library pocket with an insert (brown) for additional photos.  I think I have almost 200 photos to include, so only my favorites will go on the outsides, the insides of these pockets are for the short stories from the side trips we made.

 Sometimes I mess up and have a bit of an area left at the bottom of a pocket from the second flap,  Once adhered, I just trim off the excess.  After inserting the binding, no one will see anyway, but I still like to trim the edge.
 So - two double sided library pockets with inserts.
 A single, double sided library pocket with an envelope with large flap on the front and another double library pocket on the back.

 Two double sided library pockets with front short flaps and back large flaps with band to use as an anchor for two particular photos.  An advantage when putting a mini for yourself together - you have a basic idea of a few of the photos you want to include/highlight.
 Another single, double sided library pocket with a miniature library pocket on the front.  I may add more to this pocket, but wasn't positive yet, so kept it simple.
 Finally, rounding out my 8 main pages, two double sided library pockets with tag pockets on the front.  One of the two has equal size tag pockets, the other has a narrow pocket and a regular pocket.
So - where did I learn to do these?  How did I create?  Well, the library pocket is a conglomeration of many, many sites.  It is one of my favorite pieces to use and I used to buy or create by printing out patterns, tracing to pp, then finally folding.  It got to a point that I did create a step by step set of instructions you can find if you want to know how I create them.  I am sure it is very similar to many other sites, but I was tired of always looking up every dimension and now there is no need!  Plus, I love swapping scrapbook items, by getting the instructions ready, everyone over in the swap at Scrapbooking Fun.Biz can create them just as quickly if desired.

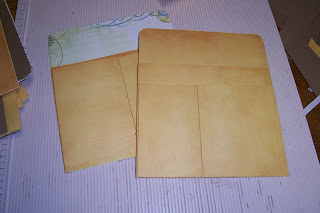
The library pockets are one of my favorite pieces to use, along with the narrow envelope I have on one of the pages.  The narrow envelope is basically  from an envelope I used in a project, liked and couldn't find in the right color, so used it as a pattern and make them when I need them.

For the bindings - I watched ustream and you-tube classes and bought various tutorials from Kathy Orta and Laura Dennison.  I have practiced many of their albums (love Kathy Orta's build a page system) and have given away many as gifts.  (though the fairy box by Laura Dennison is still only partially completed - I keep running out of the clear acryllic I am using for pages - maybe I will finish this year :)

I started with various techniques they taught, and now create my own designs.  The Giraffe Double Mini Album (you can find it in December Archives on this blog) is the most complex I have done without a pattern.  I started with some pocket protectors the individual wanted me to use and a Giraffe hanging she had found and went from that point.   I only have a few photos shown - it takes 45 to display all the pages/flaps/etc..

After all the work of the Giraffe album, I realized I cannot remember where I learned how to make various items (there are more blogs and you tube videos, but I cannot remember them all) and so I don't give out patterns for my books as I cannot remember who to credit with the original technique.  I know I have altered from what has been taught, but it would feel a bit like plagerism if I printed them on my blog.  Sooo - I strongly encourage you to visit their sites, try out the tutorials/patterns and enjoy your journey.  I know I have enjoyed many hours of learning and creating and hope you enjoy your time as well.
Thursday, January 3, 2013

A Counterfeit Kit challenge

Below are photos from my kit.  It sure doesn't look like I started with the Envisioning Beauty idea on their site from Cassie at Paper Issues, but that is where it all began.  Everything came from my stash.  Once my idea was in mind, it came together very quickly.

First, thinking about what to include.  Then I started gathering, but changed my mind mid-way through from Christmas to Travel.  The results?  A rather large kit.
 First stop - Cardstock.  Two sheets of brown, two green and two white textured AC Cardstock.  Also, a package of kraft Recollections cardstock that will be used to make the album.

Next stop, time to add some patterned paper.  I know I will need at least 18 sheets, however, after adding what I had that I wanted to use (next photos), I was a few sheets short.  Not short on pp, just short on using my stash with a specific line.  So, out comes an old standby - Ephemera papers by Hot off the Press.  Some of the pages are missing, but the next photo shows one of tags and misc. items that can be cut out and I found them very inspiring.

 Next stop, more patterned paper.  These are also from my stash.  Not sure how old they are or who the manufacturer is.  It really doesn't matter, the colors and feel are exactly what I wanted.
 Next stop - more single sided patterned papers.  The top row are from My Mind's Eye Abbey Road collection, one sheet of each.  The bottom row are from a KI Memories pad.  The stripes matched better than I thought and the color hues are perfect.  Two sheets of the red, stripe and blue/green.  Only one sheet of the yellow.  However, I did check out my scraps (stored sorted by basic color) and I found some of the red floral that I have added as well.
 Final patterned paper stop - two sheets of double sided patterned paper from another KI Memories pad.
 Next stop introduces a few 'tools' that I had on hand.  Two sets of travel stamps.  One by Unity Stamp and the other by TPC Studios.
 Next stop, embellishment time.  Below are a few embellishments I found in my stash.  On the right you will see some sheets of pre-embossed paper.  These were all found in my bag of embossed elements.  There is another small bag of embossed leaves towards the left side of the photo that also came from my bag of embossed items.  Next you will see three 12" long strips of distressed rub-ons.  These came to me as a prize and I only selected three from the package to use here.  Below the rub-ons you will see a few pieces I created with alcohol inks for a ustream class a few months ago.  One is made from a piece of acrylic, the other from a piece of chipboard covered with foil and embossed.  Above the rub-ons you will see a border from a travel swap I participated in last year.  I really enjoy swaps - and love to use the pieces.  The final stop for this embellishment photo are the three items of pre-made embellishments - some metal frames with travel words, some Heidi Swap photo plates and some corner brads from a contest over at Scrapbooking Fun.Biz several years ago.
 A quick/up close view of some of the embossed pieces - music, pooh bear, floral, paisley and one other floral type piece.  The black sheets are all core'dinations.
 Next we find a handout from the Retreat attended in September with other ladies from SBF.Biz.  It is a notepad, but I plan to take the top apart and either use for the cover or a page inside the album.
Now we find ourselves stopping at another embellishment baggie.  Inside we find glitter glue, a metal frame, oversized paper clip, some grungeboard tags, various ribbons and fibers, brads, a few flowers and even an American Flag.

Our final embellishment bag stop (and the end of our tour) brings us to some chipboard elements from various sources as well as more swap pieces - leaves, flowers, stick pins, journal elements and even a title block.
I can't wait to get started with this album.  Most of the photos are printed and now that the paper is picked out, I can get going on the actual mini for this wonderful trip.

UPDATE:  I had to add 8 more 12 x 12 sheets to this kit (All Fall by Fancy Pants) as the mini I am making required 12" lengths to create each page.

Wednesday, January 2, 2013

Another Challenge Completed!

Another page for the January Scrapbooking Fun.Biz 2013 Challenges.    Two down, two to go.

The title was a lot of fun.  It was created with paper towels.  Wish I could take credit for the idea, but I saw it in either a copy of Scrapbooks, etc. or Creating Keepsakes (a year or two old).  The letters are cut from four paper towel layers, then I used some book thread to add beads.  Inked the edges with some Colorbox Royal blue ink and attached with Scotch quick dry liquid glue.  Caution - don't forget what you are using and try to use an ATG on the letters.  The results are not nice.

The embossed paper is Core'dinations - a pack of neutrals to go with a Cosmo Cricket line of papers, but the neutral works great with this DCWV Animal Safari stack paper.  The elephant border is from a swap.  The fire truck and alligator were cut from cricut cartridges Paper Doll Dress Up and Zoobaloo.  The giraffe print embellishment, highlighting the words Monkey Business (colors aren't perfect above) is from Oriental Trading.  The Chomp circles are cut from another sheet from the DCWV stack.  Finally, the journal tag is from my stash.  Wish I had a clue where/what it is from, but I don't.  It is perfect for my needs here!

Well - two more layouts to finish over at SBF (Scrapbooking Fun.Biz) by the end of the month.  The rest of this week is cleaning up and organizing a 'spare room' that the youngest hope to convert into a room they can enjoy.  They will get part of it - providing they keep it clean :D. 

Have a wonderful week

Tuesday, January 1, 2013

First Layout of 2013

It is a Halloween one for the Use a Swap Challenge over at Scrapbooking Fun.Biz.  This challenge runs through the end of January (there are actually 4 for this month) and all members are allowed/encouraged to participate!  Basically, I was to use a swap for the page.  I found some from 2008 (hmm, 5 years old? - glad someone put a date on the back) and some others that weren't quite so old.  Total blast to start out my morning while waiting for the fireplace to start back up.  Kids forgot to refill pellets last night (their job, but they got busy playing a game, fell asleep and woke up in a cold room at 3 am LOL).

Anyway - paper is old (at least as old as the swaps) and Halloween items are kept in my Halloween drawer, so it was a lot of fun going through swaps/papers/buttons.  Basically - made my own kit!  Thought I was the only one who did this for a long time.  Until, that is, I came across this cool blog called Counterfeit Kit Challenge.  Definitely going to be checking them out for new ideas and such.


The "white" space in the top right corner of the left hand page was really hard for me to just leave there.  But, I did it and am celebrating small accomplishments this am :D

HAPPY NEW YEAR!!!