As usual, I will be showing my take on the project.
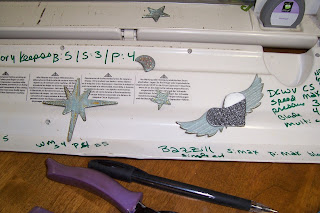
First - he has some movers and shapers butterflies. I do not, but I do have some grungeboard in my stash, so I figure out what images I plan to use instead. Below are the grungeboard pieces I think I may use. However, last minute I may change out for some butterflies from my swap stash or something a bit different.
His tag uses wonder tape (or terrifically tacky or other sheet tape) and cuts some bits and pieces of paper for the patchwork look that is so pretty. I don't have any of the tape on hand, but I do have plenty of embossing powder and glossy accents - so let's see what happens:
First - my embossing powders don't match, but I like Pearl Green and Gun Metal, so I am inking up and adding the embossing powder first. I am not positive this is the look I will use, but I do know that I am really liking my new non-stick heat resistant craft mat. I did use an embossing ink pad for this. I don't, normally, but it is one I have had and need to use up as I forgot I owned it and bought a new one. I can not return the new one since I had lost my receipt by the time I realized I didn't need the new one.
A bit of glue and I have the winged heart I wanted.
Next step - color for the grunge embellishments. I have some bits of paper, but I prefer stickles and some smooch inks for the starts I picked. I also really like the enamel accents by ranger, but they are fairly tough for me to find these days. (spoiler - my tags rarely turn out like the ones he creates, but I usually use his as inspiration, rather than something I copy straight out). So, while these pieces are drying - onto the next step.
He has a wood stamp, I don't, so here goes with trying my embossing folder with wood grain. First, I inked my folder and put 1/2 the tag through.
Ink again and run through the 2nd time. I didn't quite get exact lineup, but it won't be noticed on final. Take a break and wash my folder. As I have noted before, I really like the Palette Inks. I used Burnt Umber for the bark.
Next, I added a little Burnt sienna to the taag and inked the edges. Yes, I did change tags - ran out to feed the puppies, came in, forgot where my coffee was and bumped it. Had to start again..
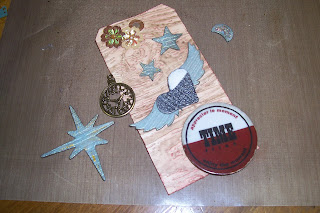
On his example, he inked the edges of his butterflies. The inks are still drying on mine, so I took some time to find a saying. The one I liked best (as I see this tag ending up on a layout) is a wonderful Li'l Davis Designs Chip-Art Coaster that I received as a hostess gift from a swap. It reads apprecier le moment/Time flies/ enjoy the moment. So, I will ink the edges with Stazon Timber Brown. Why Stazon? because there is a glossy surface on this coaster and I want it to dry quickly and become permanent.
Another question that comes up - how to store inks? I store them upside down in my dental cabinet. It was a bit like a puzzle to get them to all fit (I have a few excess pads that share a drawer with sponges and some other items), but this is the system that works for me. I can find them quickly and put them away just as quickly.
I also inked the grungeboard pieces I plan to include.
Next, he added some foliage. I changed it up a bit there too. Below you see some gathered items - now to finalize my placement decisions.
Added some paper scrap that I ran through my xyron and trimmed the edges, a piece of lace I found and cut some pieces from, a polka dot ribbon that matches some of the photos.
Oh - I did add a few spritzes of gold glimmer mist. I am not overly impressed with any of the mists, just tried it as he had in the video.
My completed tag:
As you can see - it looks almost nothing like the original. I love to see others ideas and jump off my own direction. By using some of the same techniques/materials but adding your own spin, you can come up with wonderful tags of your own.


